Gen 3 Mount for Starlink, Adjustable Wall Mount Compatible with Starlink Mount with Telescoping Support Arm, Rustproof, Weatherproof for Concrete Walls and Wood Walls, Easy Installation Black
스타링크용 3세대 마운트, 조절 가능한 벽 마운트, 텔레스코프 지지 암, 녹슬지 않음, 콘크리트 벽 및 목재 벽용 내후성, 간편한 설치 블랙
| 상품번호 | B0DT7134B5 |
| 상태 | Used |
| 브랜드 | Bloazzup |
| 판매자 | Amazon Resale and Fulfilled by Amazon |
| 출고국 | 미국 (US) |
아마존 판매가
$34.99
약 51,575원
구매대행 예상 비용은 로그인 후 확인하실 수 있습니다.
상품 특징
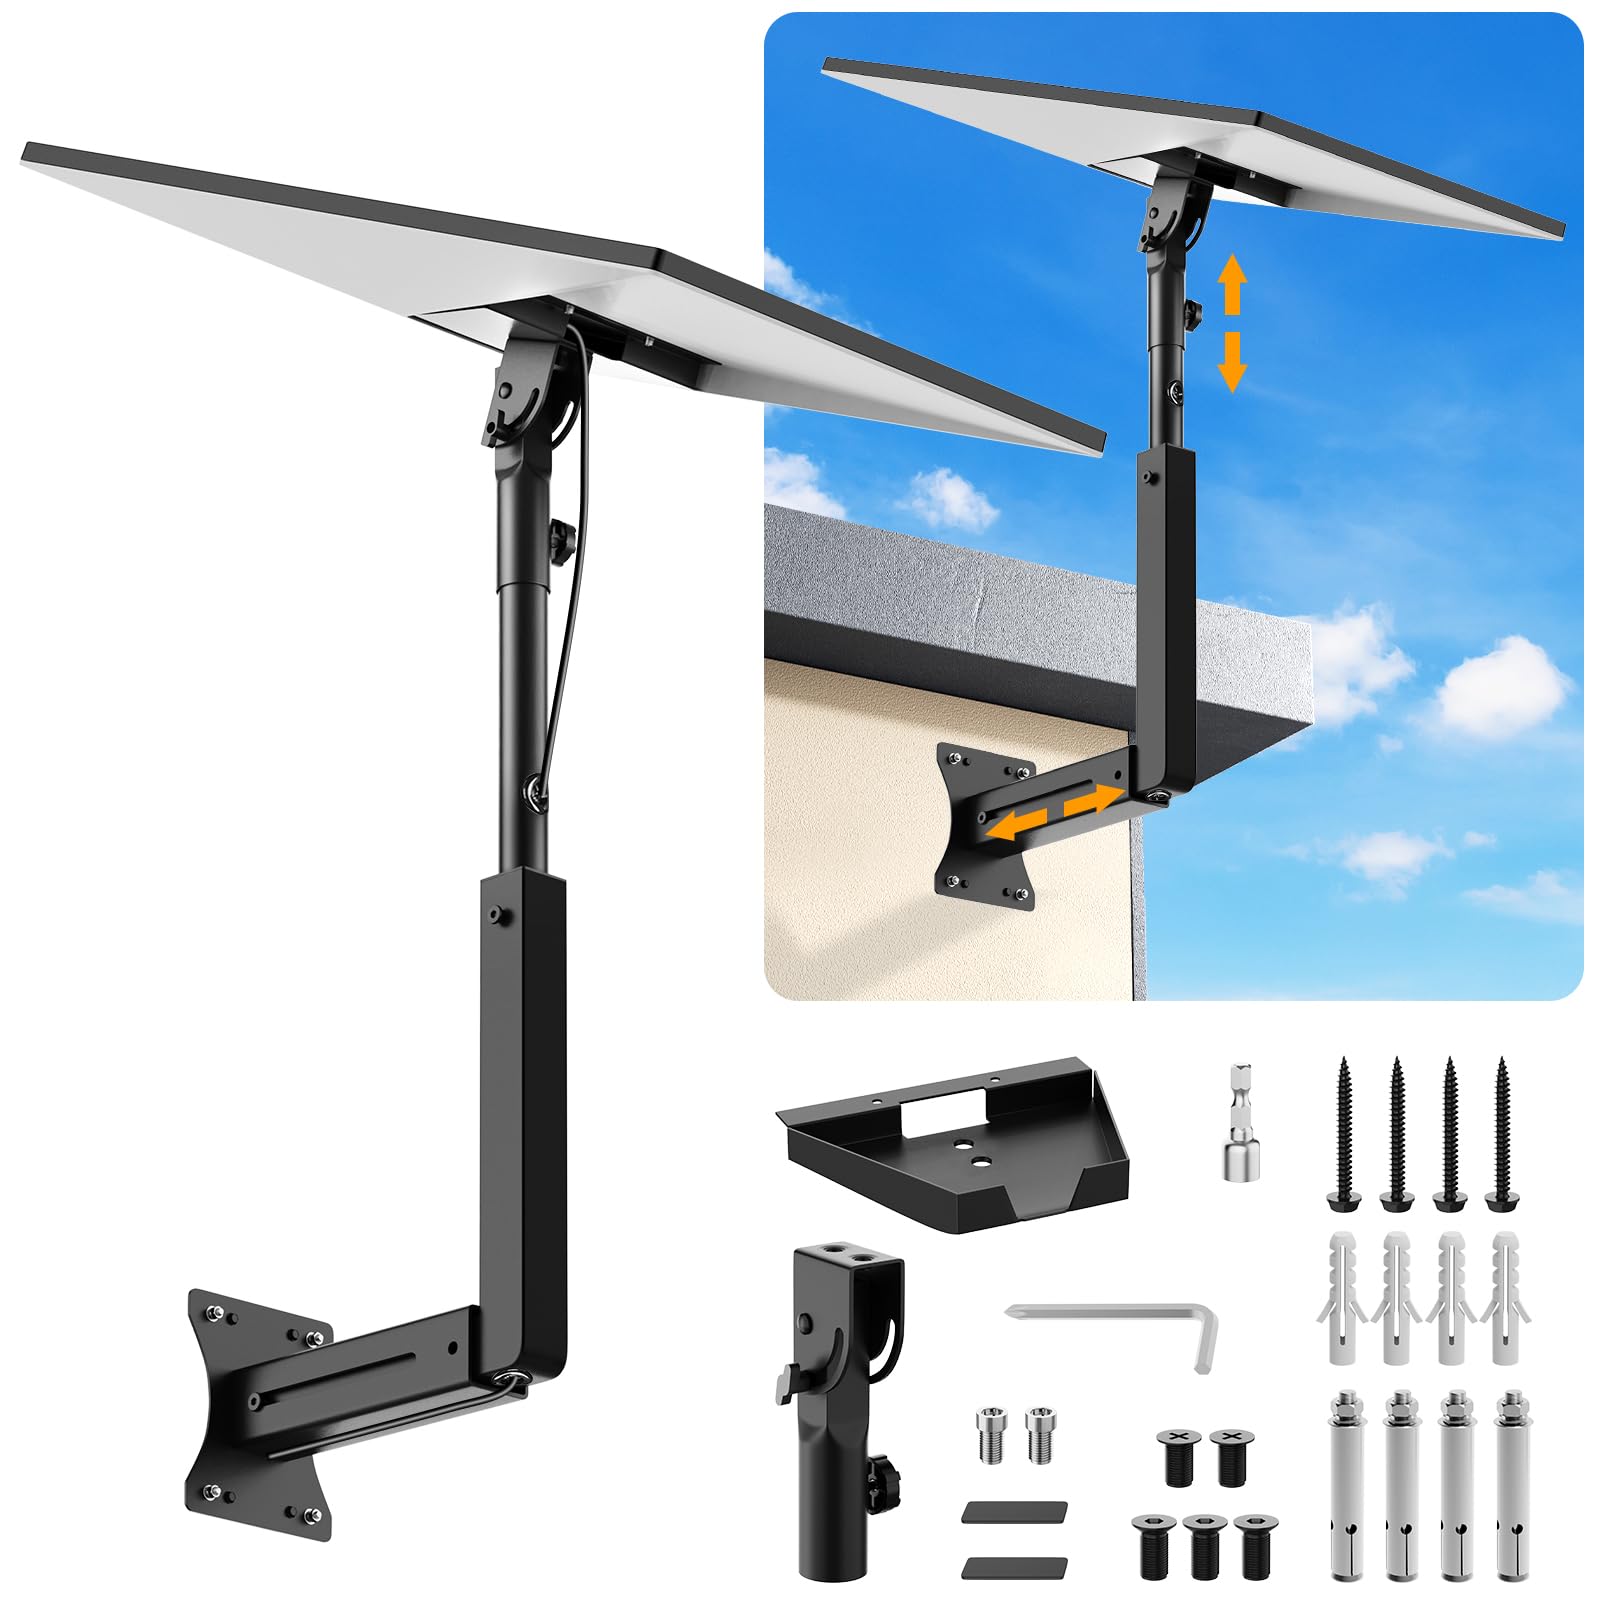
ADJUSTABLE: Our starlink mount gen 3 features a retractable design with a support arm that telescopes up and down, back and forth, providing more versatility than a fixed length mount. Seamlessly compatible with your current Starlink Gen 3 antenna mount, you'll enjoy an unobstructed view no matter where you place it
HIGH QUALITY: Our starlink mounting kit is made of top-grade metal to ensure a long life and can withstand over 60 pounds of weight. And the starlink pole mount gen 3 comes with hidden cable holes to prevent damage to your cables, this thoughtful design not only enhances aesthetics but also protects the Starlink Gen 3 V4 from environmental wear and tear
ANGLE ADJUSTMENT: Starlink gen 3 (Standard) can be adjusted from 90-180° to ensure optimal reception of the signal. With its rustproof, windproof, and weatherproof properties, this starlink mount gen 3 ensures optimal performance in all conditions
VERSATILITY: Our starlink roof mount, starlink pole mount comes with two types of screws: expansion screws for concrete walls and lag screws for wood roofs. Suitable for a variety of walls such as wood, brick or concrete
EASY INSTALLATION: This starlink wall mount is simple to install. Simply drill the holes, secure the brackets, and plug directly into the Starlink Gen 3. This flexibility makes it an essential component for starlink mounts. The length of the mounting plate is 5.9 in/15cm, and the width is 5.11 in/13cm
ATTENTION: Compatible only with Starlink Standard 4, 4x, Gen 3, V4. Not compatible with Starlink Mini, Starlink Performance Gen 2, Starlink Performance Gen 3, Starlink Standard Actuated. Please note that there are no screw holes on the satellite dish, and wehave these two screws just to further secure the connectionbetween the signal boardand the bracket. So you just need to put the two spacers into the holes in the satellite dish first, and then gently twist the screws to complete the installation. Be careful not to screw the screws too hard to prevent the spacers from being turned through and damaging the satellite dish
HIGH QUALITY: Our starlink mounting kit is made of top-grade metal to ensure a long life and can withstand over 60 pounds of weight. And the starlink pole mount gen 3 comes with hidden cable holes to prevent damage to your cables, this thoughtful design not only enhances aesthetics but also protects the Starlink Gen 3 V4 from environmental wear and tear
ANGLE ADJUSTMENT: Starlink gen 3 (Standard) can be adjusted from 90-180° to ensure optimal reception of the signal. With its rustproof, windproof, and weatherproof properties, this starlink mount gen 3 ensures optimal performance in all conditions
VERSATILITY: Our starlink roof mount, starlink pole mount comes with two types of screws: expansion screws for concrete walls and lag screws for wood roofs. Suitable for a variety of walls such as wood, brick or concrete
EASY INSTALLATION: This starlink wall mount is simple to install. Simply drill the holes, secure the brackets, and plug directly into the Starlink Gen 3. This flexibility makes it an essential component for starlink mounts. The length of the mounting plate is 5.9 in/15cm, and the width is 5.11 in/13cm
ATTENTION: Compatible only with Starlink Standard 4, 4x, Gen 3, V4. Not compatible with Starlink Mini, Starlink Performance Gen 2, Starlink Performance Gen 3, Starlink Standard Actuated. Please note that there are no screw holes on the satellite dish, and wehave these two screws just to further secure the connectionbetween the signal boardand the bracket. So you just need to put the two spacers into the holes in the satellite dish first, and then gently twist the screws to complete the installation. Be careful not to screw the screws too hard to prevent the spacers from being turned through and damaging the satellite dish